
Your parking lot is the first thing customers, tenants, and inspectors see when they pull onto your property. A cracked, faded, or potholed lot signals neglect before anyone walks through your door, and in Tennessee's competitive commercial landscape, that costs you money. The good news is that a large portion of routine parking lot upkeep is genuinely DIY-friendly when you approach it with the right tools, timing, and technique. This guide covers exactly what to inspect, what to fix yourself, and when it makes more sense to bring in a professional crew before a small problem turns into a five-figure repair bill.
Table of Contents
- Why proactive parking lot maintenance matters
- What you need: Tools, materials, and timing
- Step-by-step: DIY crack sealing and sealcoating
- Striping and marking: DIY paint vs. advanced materials
- Common pitfalls and how to check your results
- What most guides miss: The limits and strategic value of DIY parking lot maintenance
- Need help or expert support? Your next step
- Frequently asked questions
Key Takeaways
| Point | Details |
|---|---|
| Regular inspections | Checking your lot for new cracks or faded stripes each season can prevent major repairs. |
| Right materials, right timing | Choose materials and schedule work around weather to ensure successful DIY results. |
| Prep and cure matters | Thorough cleaning and allowing proper cure time are key to durable, professional-looking repairs. |
| Know when to call pros | Severe damage or base failures need expert asphalt repair, not just surface treatments. |
Why proactive parking lot maintenance matters
Tennessee commercial properties face a specific set of challenges. Freeze-thaw cycles in winter, intense summer heat, and heavy rainfall all work together to break down asphalt faster than in more temperate climates. Add daily vehicle traffic and the occasional heavy delivery truck, and your pavement is under constant stress from multiple directions.
Here is what that stress actually costs you if you ignore it:
- Small surface cracks left untreated allow water infiltration, which freezes, expands, and turns a hairline crack into a pothole within one or two seasons
- Faded striping creates parking confusion, increases the risk of fender-bender liability claims, and can put you out of parking lot ADA compliance if accessible spaces are no longer clearly marked
- Oil stains and surface oxidation accelerate aggregate loss, making the top layer of asphalt brittle and prone to raveling
- Standing water zones from grade issues indicate drainage problems that worsen with every storm
- Unmaintained lots lower perceived property value, which directly affects tenant renewals and customer traffic
"Routine pavement maintenance guidance emphasizes identifying early damage, scheduling preventative crack-filling and sealcoating, and using a maintenance plan to extend asphalt life."
The financial argument is straightforward. Preventative maintenance typically costs a fraction of what full-depth asphalt replacement runs. A well-timed sealcoat and crack-fill program can add years to your lot's life. The sealcoating benefits extend beyond appearance, including UV protection, fuel and oil resistance, and water repellency. Protecting that investment starts with showing up regularly and doing the basics right.
What you need: Tools, materials, and timing
Jumping into parking lot maintenance without the right gear is how projects fail. Below is a practical breakdown of what you will need for the most common DIY tasks.
Essential tools and materials
| Task | Tools needed | Materials needed | When to use |
|---|---|---|---|
| Crack filling | Blower or compressed air, wire brush, caulk gun or pour pot | Cold-pour crack filler, backer rod for wide cracks | Spring and fall |
| Sealcoating | Squeegee applicator or sprayer, mixing paddle, drill | Coal tar or asphalt-based sealcoat, primer for oil spots | Late spring through early fall |
| Parking lot striping | Line striper machine, measuring tape, chalk line | Waterborne traffic paint or thermoplastic sticks | After sealcoating, spring restriping |
| Pothole patching | Tamper, shovel, putty knife | Cold-patch asphalt mix | As needed, year-round |
| General cleaning | Push broom, leaf blower, pressure washer | Degreaser for oil stains | Before any surface treatment |
Timing is everything in Tennessee
Tennessee's climate creates specific windows where surface treatments actually work. Cold-pour crack filler sets poorly when surface temps drop below 50°F, and sealcoat will not cure properly in those conditions either. Crack sealing above 50°F supports proper adhesion and curing, which is why scheduling your work in late March through May or September through October gives you the best results in this region.
Avoid applying sealcoat when rain is expected within 24 hours. Check your forecast for at least a 48-hour dry window, especially in spring when Tennessee weather shifts fast.
Safety gear checklist
- Safety glasses and chemical-resistant gloves when handling sealcoat
- Knee pads for close-up crack work
- High-visibility vest if working in an active lot
- Traffic cones to close off treated sections
Pro Tip: Rent a commercial-grade crack melter or pour pot from a local equipment supplier if you have more than 200 linear feet of cracks to fill. The rental cost is minor compared to the labor savings, and you will get a more consistent bead than with hand-poured cold filler. For more context on what materials and equipment to source, see what goes into asphalt tools and materials at the professional level.
Understanding the terminology on product labels also matters. If phrases like "penetrating sealer" or "aggregate texture" are confusing, a quick read through asphalt terms explained will save you from buying the wrong product.
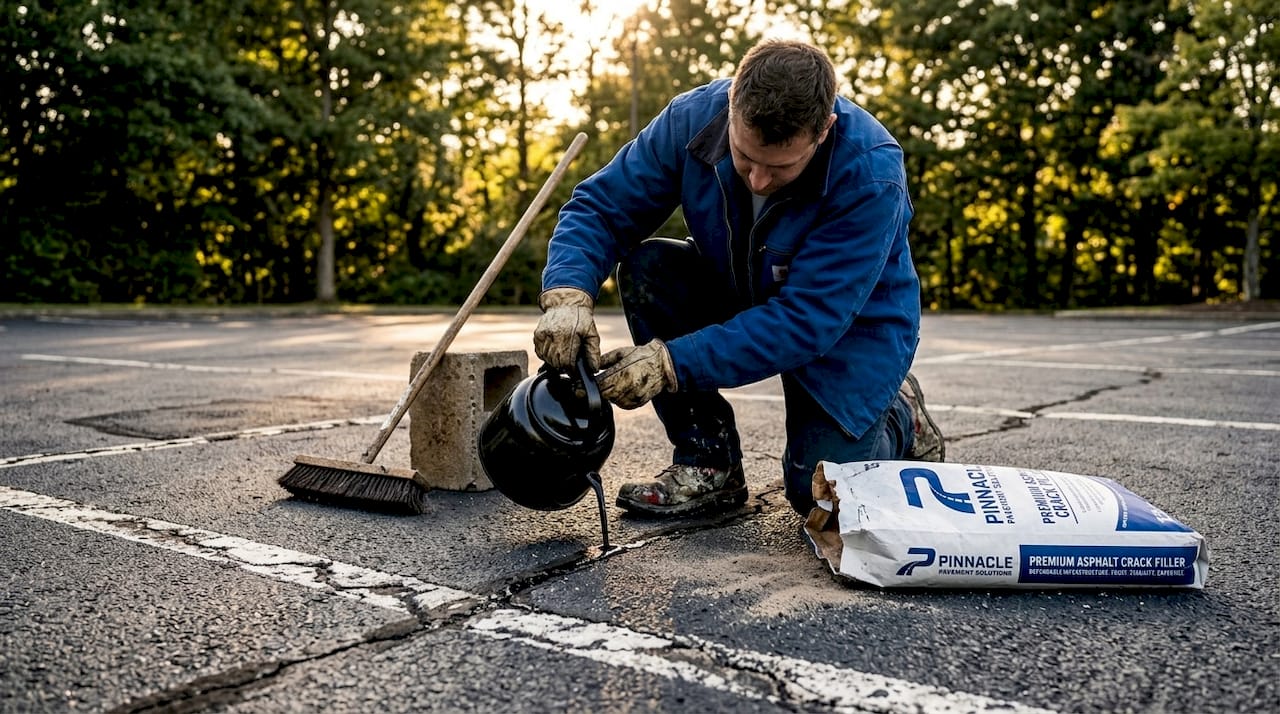
Step-by-step: DIY crack sealing and sealcoating
This is where most DIY parking lot projects succeed or fail. Rushing the prep work is the single biggest mistake property owners make.
"Surface prep and crack-type-specific filling are critical to avoid premature failure when sealcoating and crack sealing as part of a preventive maintenance workflow."
Follow these steps in order:
- Inspect the entire lot on foot and mark all cracks with spray chalk. Classify them: hairline cracks (under 1/4 inch), medium cracks (1/4 to 1/2 inch), and wide cracks (over 1/2 inch).
- Clean the surface thoroughly. Blow out all loose debris from cracks using compressed air or a gas-powered blower. Use a wire brush on stubborn edges. The goal is bare asphalt contact, not crack filler bonding to dirt.
- Treat oil stains before anything else. Apply a commercial degreaser, scrub it in, and let it sit for 15 minutes. Rinse and repeat. Untreated oil spots will prevent sealcoat adhesion and leave soft, tacky patches that never fully cure.
- Fill cracks by type. For cracks under 1/2 inch, cold-pour rubberized crack filler in a continuous bead, slightly overfilling to account for settling. For cracks wider than 1/2 inch, insert a foam backer rod first to give the filler a base, then use hot-pour or heavy-bodied cold filler on top.
- Allow crack filler to cure. Follow the product label, but in Tennessee's heat, cold-pour filler typically sets to traffic in 30 to 60 minutes. Give it the full cure time listed before sealcoating over it.
- Repair potholes and edge deterioration. Tamp cold-patch asphalt mix firmly into the void in 2-inch layers. The surface should be slightly proud of the surrounding pavement and will compact further under traffic.
- Apply sealcoat. Mix the sealcoat thoroughly using a paddle mixer on a drill. Apply in two thin coats rather than one thick coat for better durability and even curing. Work in sections and keep a wet edge. Most lots need 24 to 48 hours of cure time before reopening.
Understanding the difference between sealcoating vs. resurfacing helps you set realistic expectations. Sealcoating renews the surface layer, but it cannot build back structural thickness. If your lot has areas that flex underfoot or has widespread alligator cracking, you are looking at a deeper repair before any sealcoat makes sense.
Pro Tip: Apply sealcoat early in the morning during summer. Tennessee afternoons can get hot enough that the product skins over before it fully flows out, leaving a streaky, uneven finish. Morning application in shade gives you longer working time and a cleaner result. For more detail on what a professional application looks like, the sealcoating process details page walks through commercial application methods.
Striping and marking: DIY paint vs. advanced materials
Once your sealcoat has cured fully (typically 48 to 72 hours after the final coat), you can restripe. Striping is one area where the gap between DIY and professional results is genuinely significant.
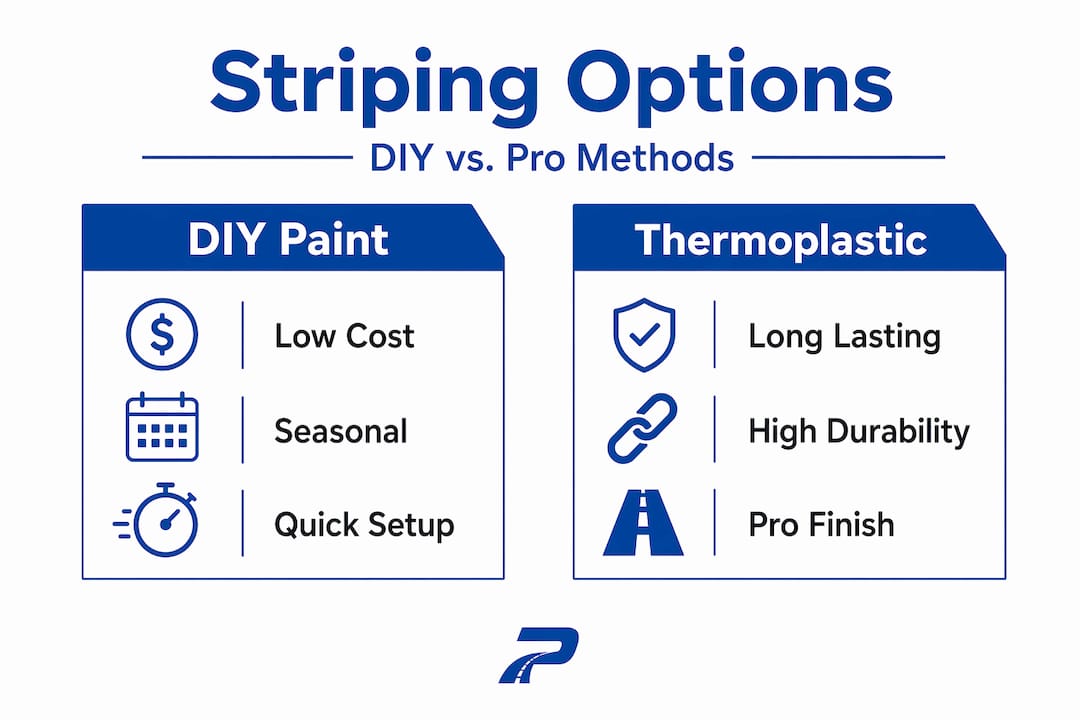
Side-by-side comparison
| Feature | DIY waterborne paint | Professional thermoplastic |
|---|---|---|
| Cost upfront | Low (paint + rental striper) | Higher (contractor installed) |
| Durability | 1 to 3 years depending on traffic | 5 to 10+ years |
| Reflectivity | Moderate, fades quickly | High, includes glass beads |
| Equipment needed | Walk-behind line striper | Thermoplastic applicator, heat torch |
| ADA compliance | Achievable with care | More consistent results |
| Best for | Low-traffic or budget refresh | High-traffic, compliance-critical lots |
DIY striping with waterborne traffic paint works well for smaller lots, seasonal refreshes, or properties with lower daily vehicle counts. The thermoplastic marking guide explains why high-traffic commercial lots benefit significantly from thermoplastic systems.
Thermoplastic markings are melted onto the pavement surface at high temperatures, bonding directly to the asphalt. They include retroreflective glass beads that make stripes visible in rain and at night. According to thermoplastic marking specifications, performance factors like reflectivity, friction values, and resistance to snow plow damage are built into the material itself, which DIY paint simply cannot replicate. Review the thermoplastic striping tips before deciding which route fits your situation.
For franchise operators managing multiple sites or properties with drive-thru lanes and fire lanes, the durability difference pays off fast. If your lot needs parking permit management on top of physical markings, parking permit decals are one way to layer access control onto an otherwise well-marked lot.
Key situations where DIY striping makes sense:
- Refreshing faded interior lines after a new sealcoat
- Small lots with straightforward layouts
- Properties where budget constraints make a full thermoplastic install impractical right now
When to call a pro for striping:
- ADA-compliant accessible spaces require precise dimensions and signage
- Fire lanes and no-parking zones with legal enforceability requirements
- Drive-thru layouts where traffic flow errors cause real operational problems
Common pitfalls and how to check your results
Even well-intentioned DIY projects can fail if a few critical rules get skipped.
Most common mistakes:
- Sealing over structural damage. Alligator cracking (interconnected crack patterns across a wide area) signals base failure, not surface wear. Sealcoat over it and you are just painting over the problem.
- Rushing cure time. Reopening a freshly sealed lot too early causes tire marks, surface transfer, and partial delamination that is hard to fix.
- Inadequate crack prep. Dirt, water, or old filler left in a crack means the new filler bonds to contamination, not pavement.
- Applying sealcoat in rain or cold. Both ruin adhesion. Sealing in cold conditions prevents proper curing and leads to peeling within one season.
- Skipping edge trimming on stripes. Sloppy lines undermine the professional look you worked to create. Use a chalk line guide and edge shields.
How to verify your results are holding:
Walk the lot two weeks after completing repairs and sealcoating. Look for these positive indicators:
- No new cracks appearing through the sealcoat
- Surface color is uniform, not blotchy or peeling
- Filled cracks have not reopened or sunk
- Stripe edges are clean and clearly visible from a driver's perspective
- No soft or spongy areas underfoot, which would indicate base problems
Pro Tip: Build a simple inspection schedule into your property maintenance calendar. A 10-minute walk-around every 60 days lets you catch new cracks before they become wide cracks, and wide cracks before they become potholes. Tennessee weather in March and November is particularly hard on asphalt, so time your closest inspections around those shoulder seasons.
Staying current on local surface expectations is also worth your time. The Tennessee pavement standards resource walks through what inspectors and code officials look for on commercial properties.
What most guides miss: The limits and strategic value of DIY parking lot maintenance
Here is an honest take that most DIY articles skip entirely: the biggest risk with parking lot maintenance is not doing too little. It is doing the wrong thing at the wrong time and convincing yourself the lot is taken care of when it is not.
Sealcoating looks impressive right after application. It fills in the surface color, hides minor staining, and makes your lot look years younger. But sealcoating is a surface treatment, not a structural fix. If water has penetrated to the base layer and compromised the aggregate, a fresh sealcoat delays the visual evidence of failure without fixing the underlying problem. You are essentially buying time, not buying repair.
The honest rule of thumb we have seen hold true time and again: DIY maintenance returns excellent value when you are working on a structurally sound lot with surface-level deterioration. Light cracking, surface oxidation, and faded stripes are perfect candidates for an owner-managed maintenance program. The ROI is real, the work is manageable, and the results last.
But once you are looking at potholes deeper than an inch, large sections of alligator cracking, or areas where the base is visibly shifting, DIY sealcoat is not the answer. At that point, you need a professional resurface or base repair before the surface treatments mean anything. Spending $400 on sealcoat over a failed base is money gone. Spending $400 on a professional assessment that tells you what actually needs fixing is money well spent.
The smartest property owners we work with treat DIY and professional services as complementary, not competing. They handle the routine upkeep themselves and call us before a repair crosses from manageable into structural.
Need help or expert support? Your next step
DIY maintenance is a smart, cost-effective first line of defense for your Tennessee commercial property.
When repairs go beyond surface-level work, or when compliance and durability matter most, Pinnacle Pavement Solutions delivers the professional-grade results that protect your investment long-term. From full-depth asphalt repairs and pothole patching to ADA-compliant professional parking lot striping with thermoplastic materials, our Tennessee-based team brings the equipment, expertise, and drone-documented quality your property deserves. Whether you want a second opinion on a repair you completed, or you need a turnkey lot restoration from start to finish, we are ready to help you get it done right.
Frequently asked questions
How often should I sealcoat my Tennessee parking lot?
For most Tennessee commercial lots, resealing every 2 to 4 years provides solid protection and keeps appearance sharp, though preventive maintenance planning and traffic volume should guide your specific schedule.
Is crack sealing possible in winter?
Crack sealing should be scheduled when temperatures are consistently above 50°F, since proper curing below that threshold is unreliable and adhesion is compromised, leading to failed seals by spring.
Will sealcoating fix potholes or structural asphalt damage?
No. Sealcoating is a surface-level treatment that protects sound pavement from oxidation and water, but it cannot restore structural integrity or fill significant voids.
Is DIY striping as durable as pro thermoplastic markings?
DIY waterborne paint is functional for routine refreshes but fades significantly faster, and thermoplastic performance specifications for reflectivity, friction, and longevity make contractor-installed markings the clear choice for high-traffic or compliance-critical applications.