Faded stop bars, missing crosswalk lines, and illegible lane markings are not just eyesores. They expose municipalities and commercial property owners to real legal liability, failed inspections, and preventable accidents. Thermoplastic marking materials are multi-component systems made from binder, pigment, glass beads, and filler, and their bond strength depends directly on thermal properties and roadway surface porosity. Getting that bond right, every time, is what separates a marking that lasts five years from one that peels off in five months. This guide walks Tennessee property managers, municipality representatives, and commercial owners through every stage of a compliant thermoplastic project.
Table of Contents
- Understanding thermoplastic markings and Tennessee requirements
- Materials and tools needed for your project
- Step-by-step application process
- Quality assurance, inspection, and common mistakes
- Hard-won lessons: Why Tennessee thermoplastic marking projects thrive or fail
- Get safe, compliant results with local Tennessee experts
- Frequently asked questions
Key Takeaways
| Point | Details |
|---|---|
| Comply with Tennessee standards | Always select TDOT QPL-listed thermoplastic materials and meet AASHTO M249 for compliant results. |
| Surface prep is critical | Thorough cleaning and correct primer use help prevent premature marking failures. |
| Precise application matters | Follow bead rates and manufacturer instructions for optimal retroreflectivity and safety. |
| Document outcomes | Maintain thorough application records to pass inspection and support warranty claims. |
| Expert help reduces risk | Tennessee-based specialists can ensure safety, compliance, and ROI for marking projects. |
Understanding thermoplastic markings and Tennessee requirements
With the stakes established, it's crucial to understand what defines a compliant and effective thermoplastic marking in Tennessee before a single kettle fires up.
Thermoplastic pavement markings are hot-applied materials that fuse to the road surface as they cool, forming a hard, durable film. Unlike paint, thermoplastic resists traffic wear, UV degradation, and water penetration far more effectively. The retroreflectivity (the ability to reflect headlights back toward drivers at night) comes from glass beads embedded in the material during application. That retroreflectivity is what makes thermoplastic the standard for roadway safety markings rather than parking lot paint.
In Tennessee, compliance is not optional. The Tennessee Department of Transportation (TDOT) maintains a Qualified Products List that identifies approved thermoplastic pavement marking materials, specifying minimum performance inputs including bead application rates. If a product is not on that QPL, it should not be going onto a Tennessee roadway, period.
The federal performance backbone for thermoplastic is AASHTO M249, the referenced specification for white and yellow reflective thermoplastic striping in solid form. Tennessee projects should align material acceptance with AASHTO M249 criteria for color, retroreflectivity, softening point, and impact resistance.
Here is a summary of key compliance parameters Tennessee contractors and specifiers should track:
| Parameter | Requirement source | Typical minimum |
|---|---|---|
| Retroreflectivity (initial) | AASHTO M249 | 300 mcd/lux/m² |
| Bead drop rate | TDOT QPL | Per product listing |
| Pigment content (white) | AASHTO M249 | 10% titanium dioxide |
| Softening point | AASHTO M249 | 102°C minimum |
| Film thickness | Project specifications | 90 to 125 mil typical |
Documentation matters as much as the material itself. Before bidding or executing a Tennessee project, you should have on hand the product's QPL listing, the manufacturer's data sheet showing AASHTO M249 compliance, bead type and rate specifications, and any primer requirements for the surface type. Inspectors and project owners will ask for these. Have them ready.
Key compliance checklist items include:
- Verify the thermoplastic product appears on TDOT's current monthly QPL
- Confirm AASHTO M249 or M247 certification from the manufacturer
- Document bead drop rates (intermix and drop-on) per the QPL listing
- Identify primer requirements based on surface age and type
- Keep copies of all material data sheets on site during application
You can review thermoplastic material options that meet these standards, and browse completed marking projects to see what compliant, professional results look like in the field.
Materials and tools needed for your project
After understanding Tennessee's requirements, assembling the right materials and tools is the next success factor. Skipping this step or substituting non-approved products is where many projects start to unravel.
Thermoplastic comes in two primary forms: solid (also called hot-applied or extruded) and preformed. Solid thermoplastic is melted in a kettle on site and applied by screed, extrusion, or spray. Preformed thermoplastic arrives as pre-cut shapes that are heated in place with a propane torch. Each has its best use case.
| Form | Best application | Advantages | Limitations |
|---|---|---|---|
| Solid (hot-applied) | Long lane lines, stop bars, crosswalks | Cost-effective at scale, fast | Requires kettle equipment |
| Preformed | Symbols, arrows, logos, complex shapes | Precise edges, no kettle needed | Higher material cost |
| Spray thermoplastic | High-speed highways | Thin film, fast cure | Specialized equipment |
Material components you will need:
- TDOT QPL-listed thermoplastic material (solid or preformed, white or yellow as specified)
- Drop-on glass beads (Type I or Type II per specification)
- Primer (required for concrete, oxidized asphalt, or surfaces older than two years)
- Propane or kettle fuel for heating
- Screed box or extrusion shoe for solid application
- Bead dispenser (mechanical or hand-operated)
- Surface thermometer and material thermometer
- Wire brush, blower, and sweeper for surface prep
- Traffic control equipment (cones, signs, flaggers as required)
- Personal protective equipment: heat-resistant gloves, face shield, steel-toed boots
Pro Tip: Always verify your thermoplastic supplier is listed on TDOT's current QPL before placing an order. The QPL is updated monthly, and a product that was approved last quarter may have been removed. Purchasing non-listed material puts your entire project at risk of rejection during inspection.
Thermoplastic bond formation depends on surface porosity and thermal properties, which is why primers are not optional on concrete or heavily oxidized asphalt. Primer fills micro-pores and creates a chemical bridge between the road surface and the thermoplastic film. Skipping primer on a concrete surface is one of the most common causes of early delamination.
Proper asphalt surface preparation before marking is as important as the marking material itself. A clean, dry, structurally sound surface is the foundation everything else depends on.

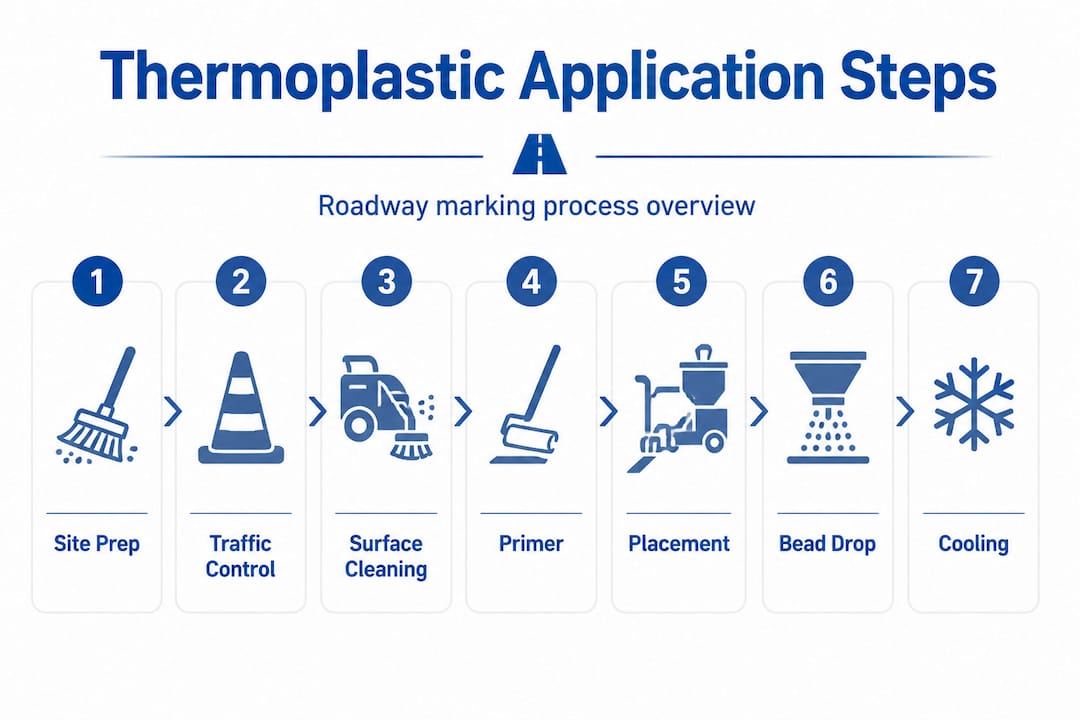
Step-by-step application process
Now, let's walk through the application from site prep to final bead drop, where each step affects durability and compliance.
State DOT application guidance organizes thermoplastic procedures into dedicated chapters covering both liquid and preformed methods, and following that structured approach is what separates professional results from field failures.
Step 1: Site and surface assessment
Inspect the pavement for cracks, spalling, or contamination. Thermoplastic will not bond to a compromised surface. Check surface temperature (minimum 50°F for most products, with the road surface dry). Identify whether primer is required based on surface type and age.
Step 2: Traffic control setup
Establish a work zone with proper signage, cones, and flaggers before any equipment is deployed. Hot thermoplastic and moving traffic are a dangerous combination. Your traffic control plan should comply with the Manual on Uniform Traffic Control Devices (MUTCD).
Step 3: Surface cleaning
Sweep the area with a mechanical broom, then blow out all debris with compressed air. Remove any existing marking residue, oil stains, or rubber deposits. The surface must be completely dry. Even light moisture can cause the thermoplastic to bubble or delaminate.
Step 4: Primer application (when required)
Apply a thin, even coat of approved primer and allow it to tack up per the manufacturer's instructions, typically 15 to 30 minutes. Do not apply thermoplastic over wet primer.
Step 5: Heating the material
Load solid thermoplastic blocks into the kettle and heat to the manufacturer's specified application temperature, usually between 375°F and 425°F. Stir continuously to prevent scorching. Overheated material loses binder properties and becomes brittle. Use a calibrated thermometer, not guesswork.
Safety warning: Molten thermoplastic reaches temperatures above 400°F. Contact with skin causes severe burns. Always wear heat-resistant gloves and a face shield. Keep a first-aid kit on site and ensure all crew members know burn treatment procedures before work begins.
Step 6: Marking placement
Apply the thermoplastic using a screed box, extrusion shoe, or preformed placement method. Maintain consistent speed and pressure to achieve uniform film thickness. For line work, use a string line or chalk guide to keep edges straight.
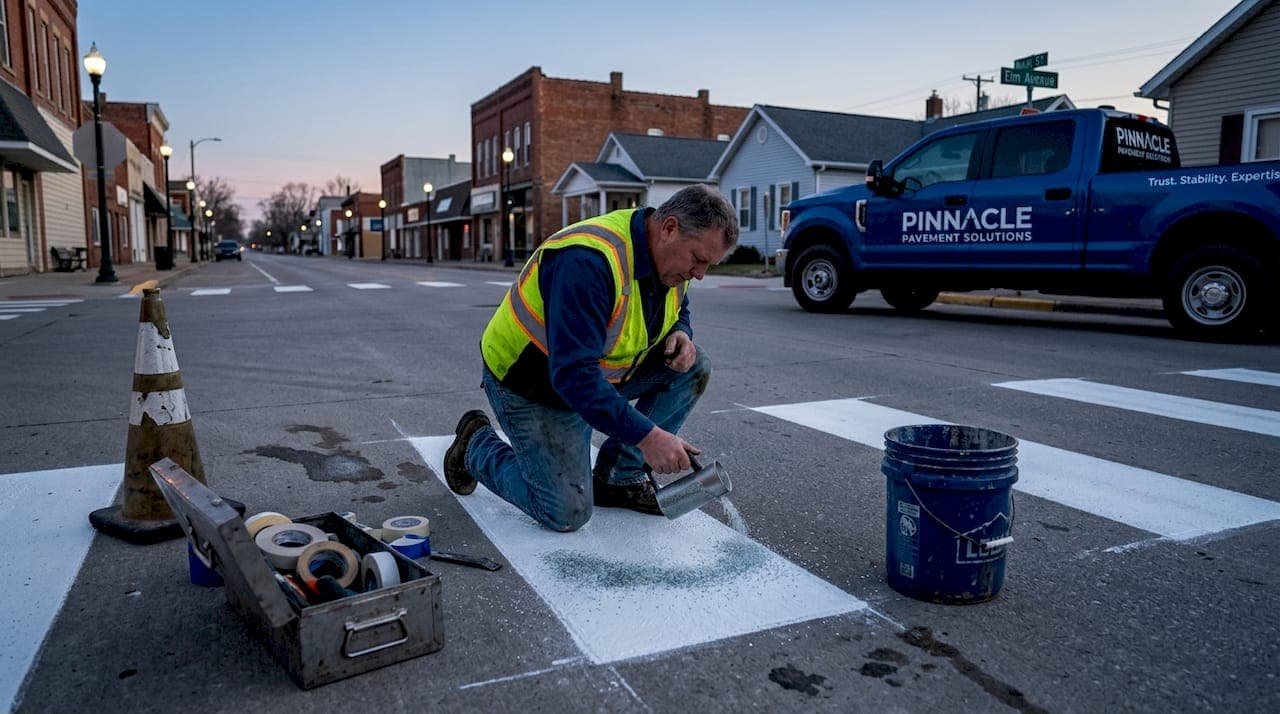
Step 7: Drop-on bead application
Immediately after the thermoplastic is applied, disperse drop-on glass beads at the specified rate using a mechanical bead dispenser. Beads must be applied while the material is still molten so they partially embed and partially protrude, creating the retroreflective surface. Late bead application is one of the most common compliance failures.
Step 8: Cooling and opening to traffic
Allow the marking to cool to ambient temperature before opening to traffic, typically 10 to 20 minutes depending on conditions. Do not rush this step. Premature traffic contact can displace beads and deform the marking edge.
Pro Tip: For large-scale projects like highway lane lines or municipal crosswalks, mechanical application equipment provides consistent speed, film thickness, and bead drop rate that hand application simply cannot match. Reserve hand tools for small symbols, touch-ups, or tight geometry. The scale of your project should drive your equipment choice, not your budget.
You can see how parking lot marking methods compare to roadway application to understand where technique differences matter most.
Quality assurance, inspection, and common mistakes
Ensuring the work stands up over time requires ongoing inspection and a watchful eye for the most frequent sources of failure.
Research confirms that thermoplastic marking performance is affected by workmanship and chemical variables including film thickness and glass bead rate and method, leading to significant retroreflectivity durability shifts. In plain terms, how the material is applied matters as much as what material you use.
Field measurement and verification:
- Measure film thickness using a wet film gauge or coring after cure (target: 90 to 125 mil)
- Check retroreflectivity with a handheld retroreflectometer (minimum 300 mcd/lux/m² for new markings)
- Inspect bead retention by running a gloved hand across the surface; loose beads indicate late application or low bead rate
- Verify edge definition: clean, straight edges indicate proper screed speed and material temperature
Documentation best practices:
| Document | What to record | Why it matters |
|---|---|---|
| Material data sheet | Product name, QPL listing, lot number | Proves approved materials were used |
| Bead application log | Rate (lbs/gal or lbs/100 sq ft), type, time | Verifies retroreflectivity compliance |
| Temperature log | Material temp, surface temp, air temp | Confirms application within spec |
| Thickness measurement record | Location, reading, pass/fail | Supports inspection and warranty |
| QA inspection form | Inspector name, date, findings | Legal and compliance record |
Common mistakes that undermine performance:
- Underheated material: results in poor bonding, cracking, and early delamination
- Wrong bead type or rate: directly reduces retroreflectivity and fails QPL requirements
- Skipping primer on concrete or oxidized asphalt: leads to lifting and peeling within months
- Applying over a damp surface: causes bubbling and adhesion failure
- Opening to traffic too soon: displaces beads and deforms marking edges
- Using non-QPL listed products: results in project rejection and costly rework
Pro Tip: Build your QA documentation package before the project starts, not after. Pre-fill the forms with project details, required specs, and acceptance criteria. This forces the crew to measure and record rather than estimate, and it gives you a defensible paper trail if an inspection question arises later.
For a broader overview of marking solutions and how QA integrates into full-service projects, it helps to see how professional contractors structure their verification process from start to finish.
Hard-won lessons: Why Tennessee thermoplastic marking projects thrive or fail
After working on thermoplastic projects across Tennessee, the pattern is clear. Projects that succeed share one trait: disciplined documentation from procurement through final inspection. Projects that fail almost always trace back to a shortcut taken early, usually in product selection or surface preparation, that nobody caught until the marking started failing.
The TDOT QPL is not bureaucratic red tape. It is a filter that removes underperforming products before they reach your road. Pairing TDOT's QPL with state DOT application method guidance is the most reliable way to reduce the risk of early debonding or retroreflectivity loss on Tennessee projects. Yet contractors routinely skip the QPL check because the product "worked fine last time" or because a supplier assured them it was compliant. Those assurances are not worth anything at an inspection.
The second pattern we see is bead application failures. Beads applied too late, at the wrong rate, or from a non-specified bead type look fine on day one. By month six, retroreflectivity has dropped below safe thresholds and the marking needs replacement. That is an expensive lesson. The fix is simple: verify bead type and rate against the QPL listing before the job starts, and measure retroreflectivity within 30 days of application.
Surface preparation remains the most underestimated step. Property managers and municipal project owners often push contractors to move faster, and surface prep is where time gets cut. Primer gets skipped. Debris does not get fully removed. The thermoplastic goes down on a surface that was not ready, and within a season, you are looking at lifting edges and delaminated sections. Proper surface prep adds maybe 20 minutes per hundred linear feet. The cost of rework adds weeks and thousands of dollars.
Our roadway marking expertise is built on the understanding that retroreflectivity and long-term durability are not accidents. They are the result of following every step, every time, with documentation to prove it. Solid QA does not just protect safety. It protects your budget and your legal exposure.
Get safe, compliant results with local Tennessee experts
Thermoplastic roadway markings done right protect lives, satisfy inspectors, and hold up through Tennessee's full range of weather and traffic conditions. Done wrong, they become a liability.

At Pinnacle Pavement Solutions, we bring DOT-grade thermoplastic application, TDOT QPL-verified materials, and full documentation to every project, whether that is a municipal crosswalk network, a commercial drive-thru stop bar, or a full parking facility restriping. Our Tennessee thermoplastic marking service covers every step from surface assessment and primer selection through bead application and retroreflectivity verification. Our pavement marking team is equipped for projects of any scale and delivers drone-documented results so you have visual proof alongside your QA paperwork. Contact us to get a quote and eliminate the guesswork from your next marking project.
Frequently asked questions
What surfaces need primer before thermoplastic application?
Primers are recommended on hydraulic cement concrete, asphalt surfaces older than two years, heavily oxidized pavement, or asphalt with exposed aggregates, where surface porosity and chemistry reduce natural thermoplastic adhesion.
How is bead drop rate verified for Tennessee roadway markings?
Bead drop rates are checked against TDOT QPL specification tables for the specific product used, and field documentation should record the actual rate applied per 100 square feet or per gallon to confirm QPL minimums were met.
How long do thermoplastic roadway markings last?
Workmanship and compositional variables including film thickness and bead application method significantly affect durability, but properly applied thermoplastic on well-prepared surfaces typically lasts three to seven years depending on traffic volume and environmental conditions.
What specs define a compliant thermoplastic marking in Tennessee?
Markings must meet TDOT QPL requirements for approved products and AASHTO M249 performance standards covering color, bead type, retroreflectivity, softening point, and verified application methods.
How can I document that my marking project meets inspection standards?
Keep records of material QPL listing, lot numbers, bead type and application rate, film thickness measurements, retroreflectivity readings, and signed QA forms that confirm all parameters were verified against project specifications.